Blog, Learn, Lightroom, Mobile, Post-Production, Tips and Techniques
iPad Pro – A Mobile Photographic Workflow
Apr
It was only a matter of time before the processing power and hard drive storage of tablets were fast enough and large enough to accomodate the needs of some travelling photographers. The primary advantage of using a tablet rather than a laptop computer is of course weight – or the lack of it. The 10.5 inch iPad Pro weighs in at just 477 grams or 1.05 pounds. The MacBook Air in comparison weighs 1,350 grams or 2.96 pounds – that’s a weight saving of 873 grams or 1.92 pounds. The weight saving is equivalent to a Sony A6500 with an 18-135 lens or a Sony A7RIII with FE 2.8/25 ZA (both of these camera options are actually a fraction less than the weight saving). The iPad Pro 10.5 inch with a 512 GB capacity is also 20 to 35% cheaper than a MacBook with the same 512 GB hard drive capacity (something you need in order to be able to store all of the photos from an extended location shoot).
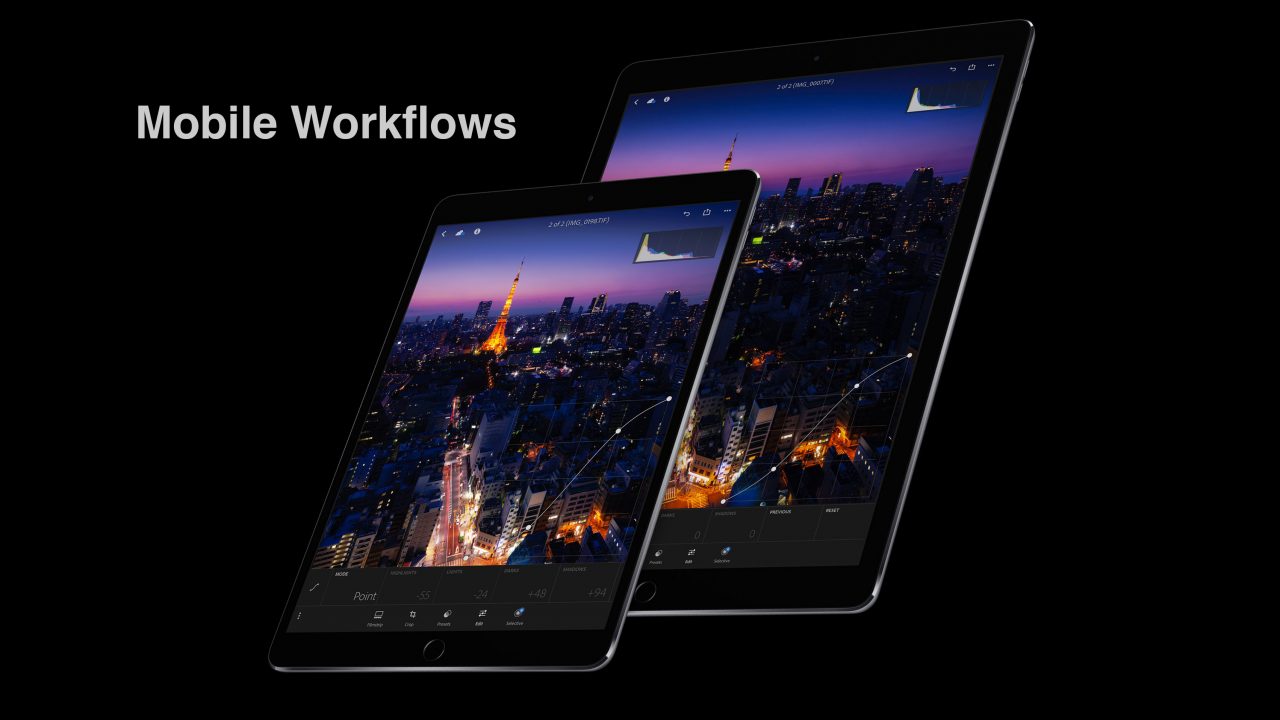
The A10X Fusion chip with 64‑bit architecture of the iPad Pro makes light work of photo processing using image processing apps such as Adobe’s Lightroom CC Mobile. Lightroom CC Mobile is a free app but if you are a Creative Cloud member you also get access to all the Premium Features. This includes the ability to edit Raw files, add ‘Selective adjustments’, such as the Linear and Radial Gradients plus adjustments via the Brush tool. Creative Cloud members will also find that any images edited on the tablet are then synchronised with Lightroom on their other devices including their mobile phone, desktop and laptop computers.
Mobile Imaging Workflows – Location Test 1
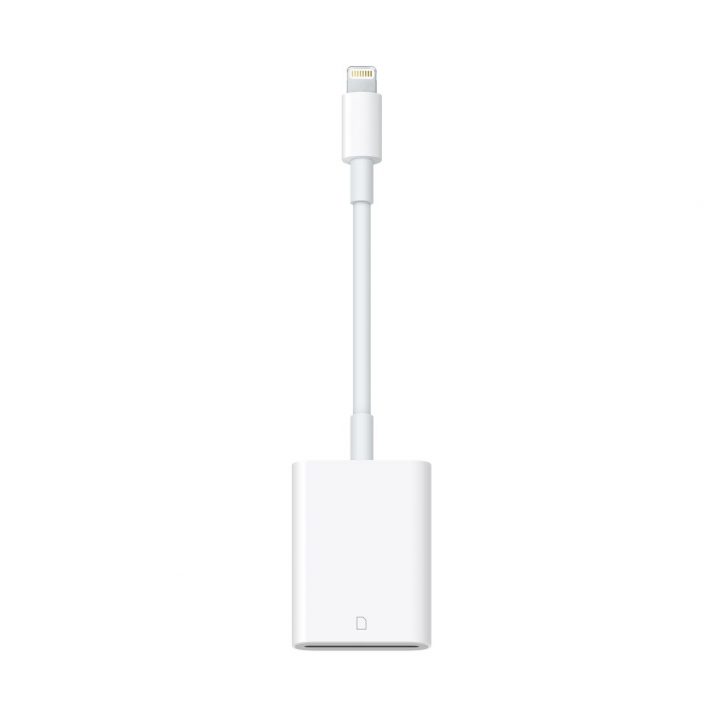
My first trip without the laptop was a 2-week location shoot in Tasmania using the Sony A7RIII and A9 cameras where I shot approximately two and half thousand, or 90 GB, of Raw images which I then transferred to the iPad Pro over the course of the trip. I chose to transfer the images to the iPad via a Lightening to SD Card Camera Reader with transfer speeds listed as being ‘up to USB-3 speeds’ when using the new iPad Pro. When the SD card is connected to the iPad, Apple’s ‘Photos’ App opens and invites you to import the Raw images. You then get the option to either Delete or Keep the images on the SD Card. As I always wanted to ensure I had at least two copies of my images I elected to choose the ‘Keep’ option with the intention of filling the entire 64 GB card and then formatting the card only when the images were archived on my LaCie RAID storage device at home. With 2 x 64 GB cards in both the A9 and A7RIII I was pretty confident I wouldn’t have the need to reformat the cards while travelling. I am using SD XC II cards in Slot 1 of each camera and these have a write speed of 299 MB/s and Apples’ Photos App imported the images quickly, although I noticed the Uncompressed Raw files from the A7RIII took noticeably longer than the compressed raw files from the A9. I did not, however, consider the import unreasonably slow. When I reinserted the card a second time I chose the option to ‘Skip Duplicates’ so the images already imported would not be imported a second time.
Mobile Imaging Workflows – Location Test 2
For my second location test I chose to use an iPad Pro in conjunction with a LaCie Copilot (often branded as a DJI Copilot). LaCie designed this external drive specifically for a mobile workflow, i.e. using a mobile phone or tablet for viewing the images, but using the 2 Terabyte storage of the copilot for image backup. This workflow is only made possible with a supporting LaCie Copilot App that is downloaded to the mobile device (called BOSS – Backup On-Set Solutions). The BOSS app works with the Copilot so that it can manage a mobile imaging workflow. When a memory card or camera is connected to the Copilot, the BOSS app on the mobile device can view the images on the memory card that has been inserted into the integrated memory card slot of the Copilot. You also have the option to Copy the images to the drive. The drive features a single button that invites the user to use a short press or long 3-second press to choose a workflow option. You can monitor or check the file transfer status, available capacity, and battery power using the integrated status screen, i.e. you don’t need to connect the Copilot to your mobile device if you don’t need to view your images. For those with a nervous disposition the Copilot verifies the Transfer process after copying the images from the SD card before indicating the transfer is complete. One minor grip of this display is that it feels the need to alternate its display mode to show you the battery capacity and available storage during a file copying/transfer procedure. I would prefer the status screen to stay with the ‘task-in-hand’ if there is more than 20% battery life and there is more available storage on the device than the total capacity of the connected memory card.
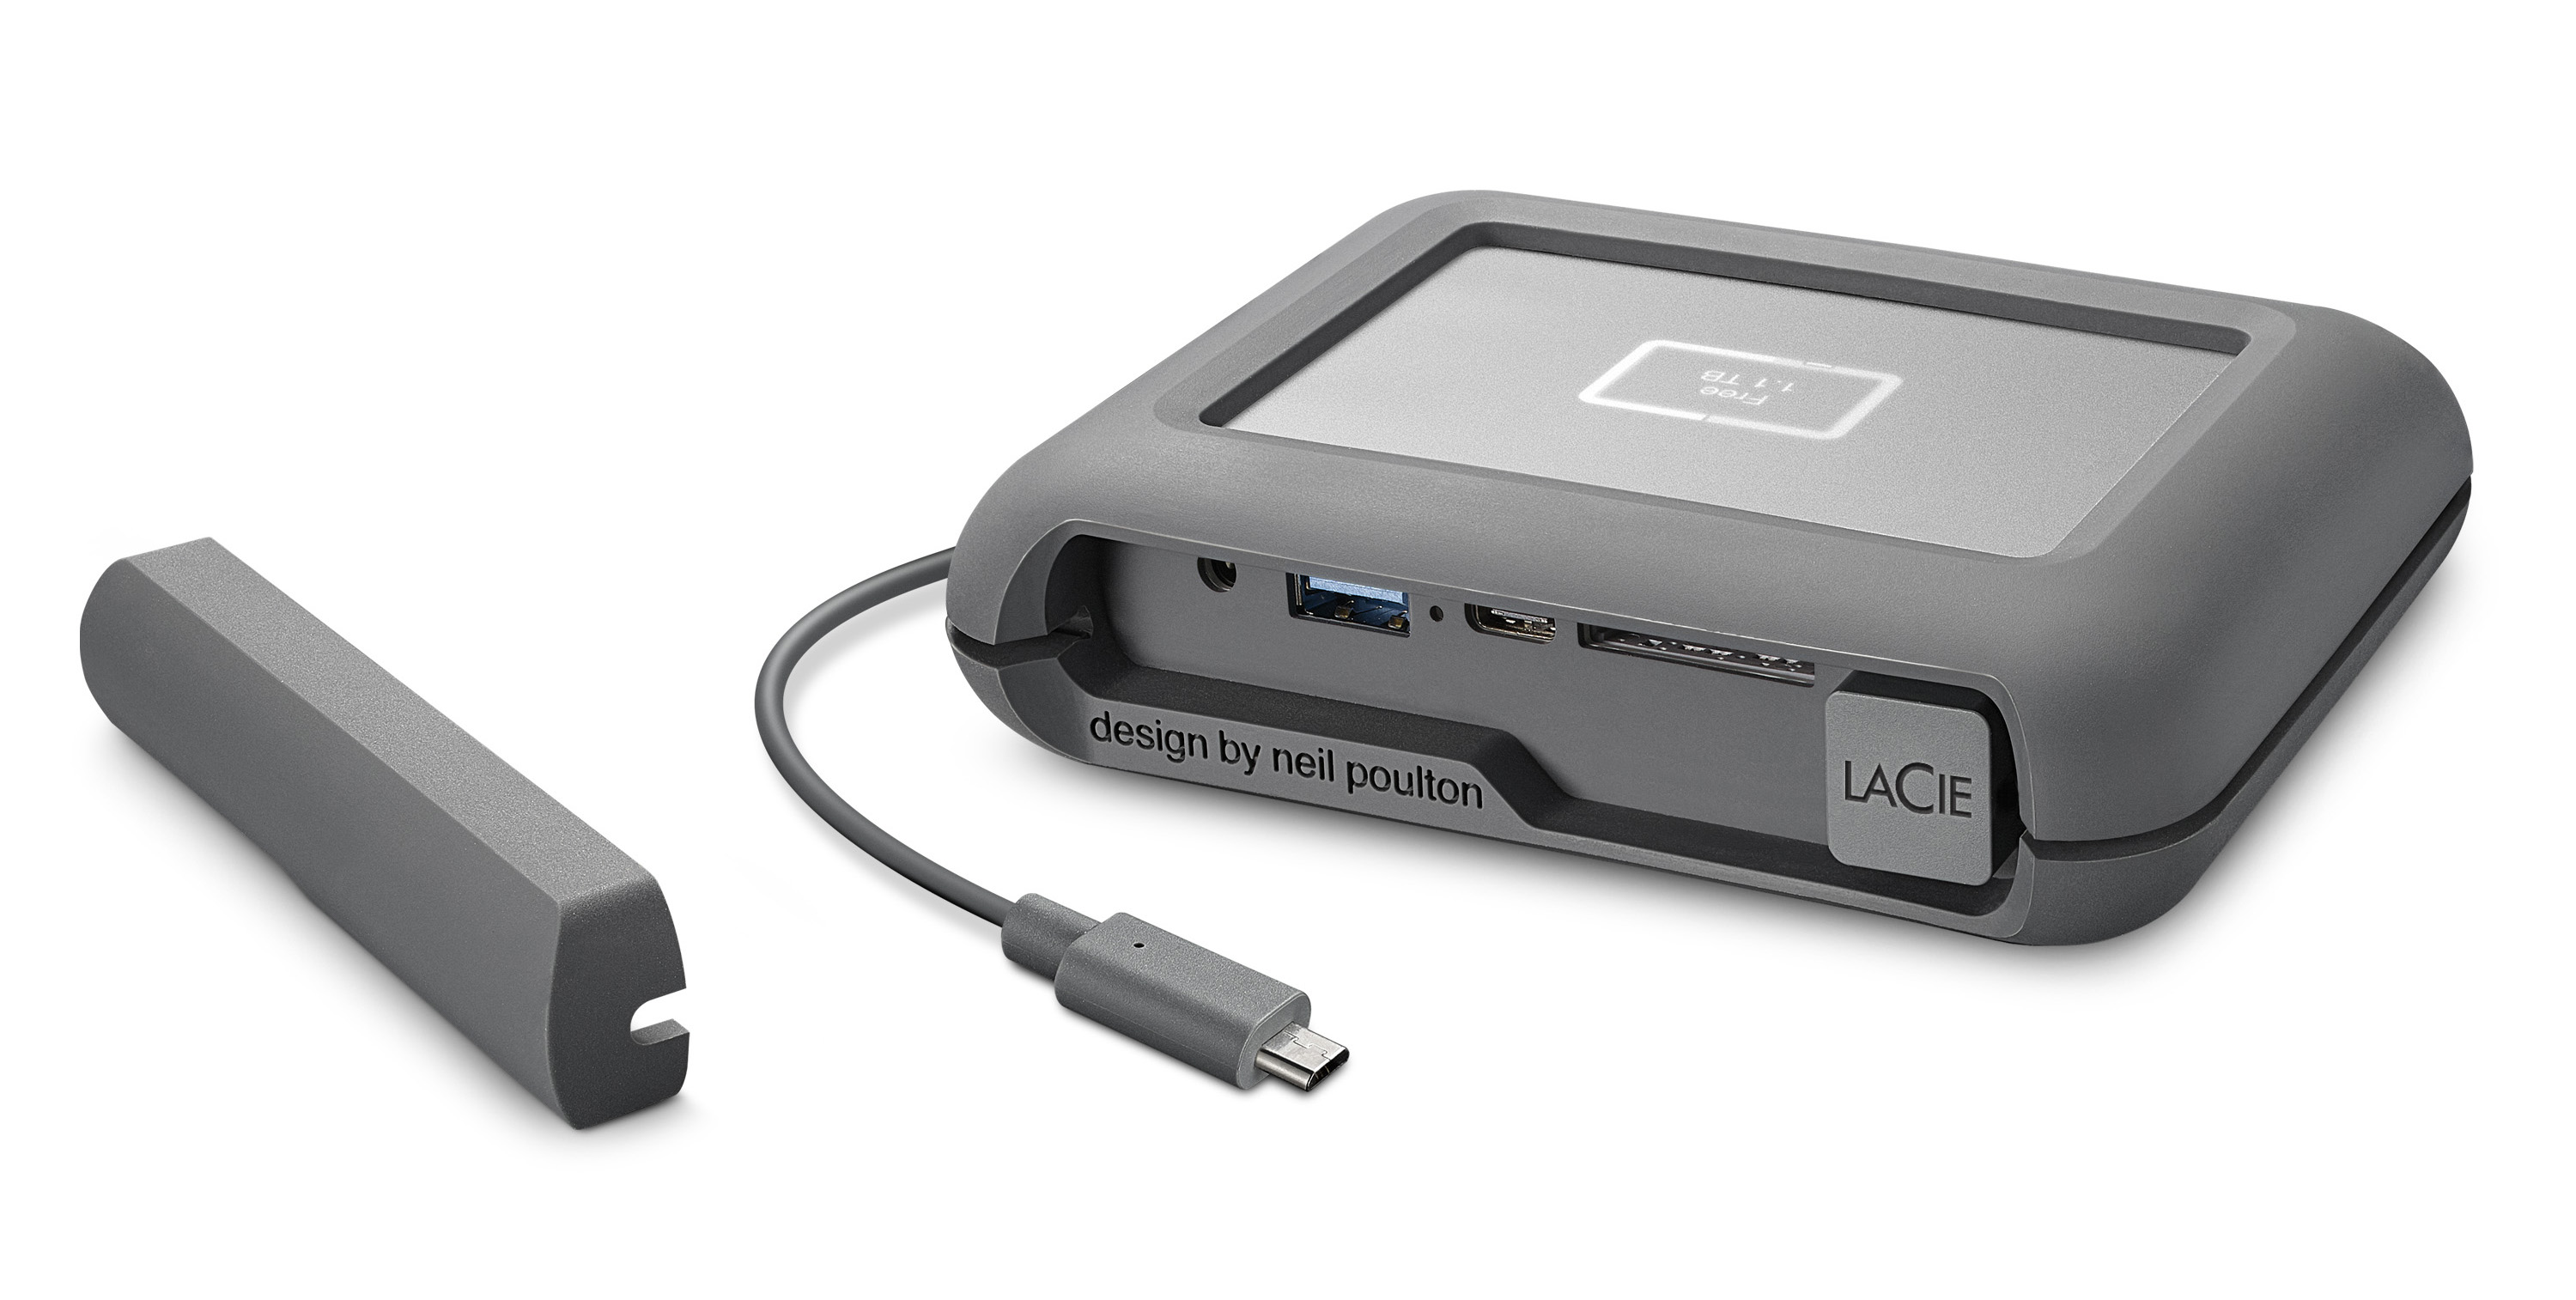
The Copilot is rugged (Drop resistant, splash resistant and dust resistant) and includes a free 3-year Rescue Data Recovery Service plan for a little added peace of mind. The drive includes an integrated lead that can be switched to suit your mobile device, e.g. micro USB, USB-C or Lightening connector). The Copilot will also charge your mobile device while you are reviewing your images using the BOSS app.
The Copilot can also be connected to a laptop or desktop computer. If connected to a computer with the CoPilot switched on it will charge the Copilot, if connected with the copilot switched off it will mount as a conventional drive.
Note > If connecting to a Mac computer do not attempt to use the Copilot as a ‘Time Machine’. Reformatting the Copilot’s drive for this purpose will render the the Copilot unreadable by your mobile device.
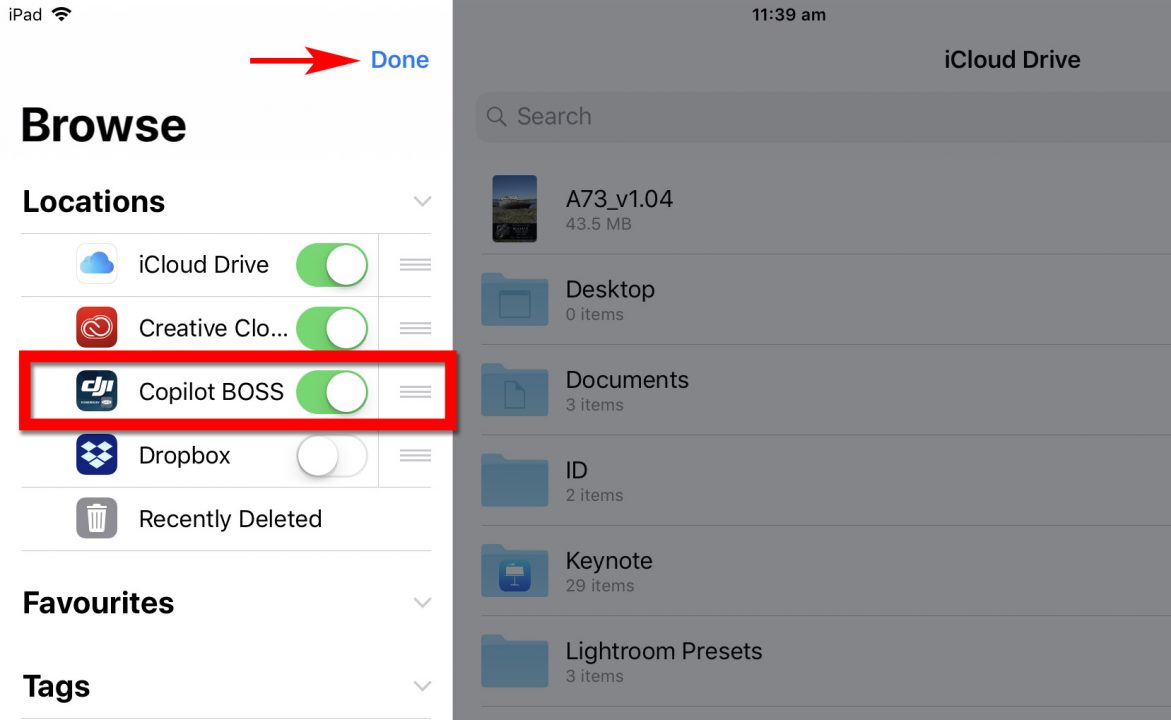
When importing images into Lightroom CC on an iPad Pro you will need to choose ‘From Files’ instead of ‘From Camera Roll’. For the Copilot BOSS App to appear in Locations you must first install the BOSS App and then go to the ‘Files’ app on your iPad and click on the Edit button. Switch the CoPilot BOSS option to ON and then you can proceed to import images into Lightroom CC. The images can be directly imported in the Lightroom CC without first copying them to Apple Photos. This App is an elegant (but not perfect) solution to a mobile user who is intending an extended location shoot where the imaging files may exceed the storage capacity off the mobile device.
Note > When choosing to Add images using the Lightroom interface use the drop down options accessed from the top right-hand corner of the screen rather than the files icon (next to the camera icon) in the bottom right-hand corner of Lightroom’s user interface. For some odd reason the ‘From Files’ options is not available from this icon.
Find out more about the LaCie Copilot here: https://www.lacie.com/as/en/products/dji-copilot/
Future Improvements I would like to see to Workflow 2 – Software and Hardware
When I heard of the LaCie Copilot I was very hopeful that this was ‘the missing link’ I was looking for. The reason this second workflow is not, however, perfect is that the original images on the memory card or on the Copilot drive still need to be imported into Lightroom CC on a mobile device, i.e. the files have to be transferred to the hard drive of the mobile device. This means that after sorting your images that have been imported into Lightroom CC you will still need to delete the ‘unrated’ and ‘reject’ images from the Lightroom Catalog to avoid unnecessary uploads to the Adobe Creative Cloud when the Lightroom Sync is switched on. Deleting unrated and rejected files is also the only way to free up the hard drive capacity of the mobile device for the next import. I believe this is a shortcoming of the Lightroom CC app on a mobile device rather than with the LaCie Copilot, i.e. Lightroom CC on a mobile device does not yet have the option to import files and leave the originals on the external media.
There are also a couple of improvements I would like to see to a future upgrade to the LaCie Copilot (this could, however, possibly be resolved by a firmware update to the device). When the Copilot copies the images to its drive it places them in a folder with the current date and duplicates the folder structure of the memory card inside of the import folder. This means that if the memory card is placed back in the camera, and the photographer does not reformat the card, the LaCie Copilot will continue to copy files it has already backed up when the card is reconnected to the Copilot a second and third time. If the photographer is using a high capacity card and is wanting to use the memory card as one of the image backups (they don’t intend to reformat their cards until they are back home) it would mean that the same files will appear multiple times on the Copilot drive (eroding its 2 terabyte capacity prematurely). Connecting the LaCie Copilot to a laptop or desktop computer when the photographer returns home is a necessary part of the mobile workflow (required in order to move the image folders from the Copilot to a larger capacity external RAID for archival purposes). The connection of the Copilot to a computer, however, I find is currently a little bit ‘clunky’. The Copilot does not want to mount to the computer if switched on (it will result in a ‘No PC Connect’ message displayed on the status screen of the Copilot) and the drive will not switch off using the Copilot’s single button if it is connected via the USB-C cable to the computer. You must either wait for the drive to go to sleep or disconnect the cable and shut it down before reconnecting. I can imagine this will be a source of confusion or frustration for some users who don’t immediately understand why their drive is not connected. The Copilot also appears to only want to connect to a computer via the USB-C cable and not via the USB-3 port on the drive. The size and weight of the Copilot may be another factor that may make someone think twice about using this device as part of their mobile workflow. The Copilot is a little larger than the LaCie Rugged RAID drive but does not offer a ‘Mirrored RAID’ advantage or the size and weight advantage of using a smaller SSD.
Even with the above negatives outlined, the Copilot still represents an important step in establishing mobile imaging workflows as a credible alternative to carrying a laptop computer on location and, as a result, will be used in my own mobile workflows until a better alternative comes along.
Managing your Mobile Data
Probably the most important advice I can give to anyone wanting to try the workflow outlined in my first Location test (images imported into the mobile device) is to Switch off Mobile Data for Apple’s ‘Photos’ app and ‘Lightroom CC’ in the iPad Settings. As we are dealing with huge amounts of data when shooting Raw it is quite feasible you could blow your mobile data allowance in a single session if these are inadvertently left on. If you have not purchased a generous amount of storage on Apple’s iCloud drive (more than you intend to shoot while you are on location) then you also need to switch off the iCloud Photo Library option, the one that wants to ‘Automatically upload and store your entire library in Apple’s iCloud’. This is a great option if you have enough available iCloud storage and you will have the option to use a fast Wi-Fi connection at some point during your travels. This would mean that if your camera (complete with memory cards) and iPad Pro were lost or stolen while travelling you would still have all of your images that were uploaded to the Cloud. I switched the iCloud Library back on while travelling when I stayed at a Motel with fast Wi-Fi.


Unexpected Cloud Activity
One thing I had not considered in this new workflow was that I own an older iMac, currently being used as an office computer (book keeping, but not image processing). The iCloud Library on this computer was switched on in the Cloud preferences (probably the Default option), so on my return from my travels this computer attempted to download the 90 GB of Raw files. Being an older computer it did not have enough hard drive storage to download this much data – but this did not stop it from trying. This led to the iMac developing problematic behaviour and then having difficulty starting up after shutting down. The computer would not run smoothly until the iCloud Library was switched off and the raw files deleted from the computers iPhoto library. The computer was so unstable until this action was carried out that just logging in and navigating to these options was problematic.
No such thing as a free lunch
The idea of paying for Cloud Storage to run this mobile centric workflow may be a deal breaker for some photographers. It is, however, possible to run the workflow without uploading originals to either Apple’s iCloud or Adobe’s Creative Cloud but many of the benefits of this workflow would be removed.

Advantages and Disadvantages of an iPad Pro imaging workflow
The first minor disadvantage to the iPad workflow is that images have to be imported into Apple’s Photos and then added to the Lightroom CC Catalog. This does not duplicate the images but the extra step is one that doesn’t exist when using Lightroom on a laptop computer. Once the images are in Lightroom CC, however, the editing experience is enjoyable. I like the tactile approach to editing images, e.g. brushing adjustments with your fingers rather than a mouse. The high resolution of the iPad screen provides enough detail for precise editing (2224 x 1668 resolution at 264 pixels per inch). The screen can also utilise the larger P3 colour gamut (larger than sRGB). The extended battery life of the iPad Pro also means that you do not need to be looking for power points in your motel room or on a long International flight. The iPad Pro also has the benefit of being able to be recharged via a portable charger.
A Bug in the Social Media sharing
At the time of writing this article I found a bug in Adobe’s mobile workflow. There is an option to share any image from your Lightroom Catalog to Social media (but Instagram is excluded from these options). If I selected an image to share with Facebook and the recommended size of 2048 px resolution (the largest image size supported by Facebook) the size of the image that was then uploaded was 960 px. The resulting images shared then looked pixellated when viewing them full screen on the iPad. The workaround to this problem was resolved by first saving the image to the ‘Camera Roll’ and then to Facebook from Apple’s ‘Photos’ and not from Lightroom.

Lightroom Mobile: Is it up for it?
Lightroom Mobile has come a long way since it first arrived on mobile devices a few years back. It is, however, only a lighter version of the Lightroom Classic edition you may be using on your desktop or laptop computer. What this means is that a few features that may be part of your exisiting workflow may be missing on the current version of Lightroom CC for mobile. Although I found editing a single images was fast and efficient, a couple of the features that were noticeably missing (at the time of this initial workflow review) were the Spot Removal tool and the Transform panel that I use to ‘Keystone’ or correct the images that were captured with my ultra wide-angle lens. These missing features will probably make an appearance in future updates, but this was the state of play while travelling in March 2018.
July 2018 UPDATE: Both ‘Spot Removal’ and the ‘Transform’ features from Lightroom CC Classic have now made there way into Lightroom CC on mobile devices. These appear as the ‘Healing Brush’ and the ‘Geometry’ panel in the ‘Edit’ user interface of Lightroom CC for mobile devices.
So what else is missing in the Cloud version Lightroom CC?
Difference are of course numerous but there are some editing workflow tools that I personally miss. These include the ability to:
- Create a Virtual Copy or Snapshot to either create an alternate edit or mark the progress in the existing edit (you do, however, have the option to create a Copy).
- Copy and Paste Edit settings to multiple images when working on Lightroom CC for iOS (iPad).
- Create an Editing Default that overrides Adobe’s default for newly imported images.
- Identify any images in the camera roll you have marked as a favourite to help you choose which images to add to your LR Catalog. This means that you have to add all images and rate in the LR app and then remove the unrated images (steps 11-13 in the ‘Step by Step’ section below).
Perhaps the single step that I really really missed was the ability to copy the settings from one edited image and then apply these settings to multiple images in the mobile Catalog when using my iPad Pro. You can apply Previous settings and ‘Copy’ and ‘Paste’ from one to another, but not paste to multiple images. This would be the feature that makes me think twice before my next trip if I was intending to shoot action/sports using continuous drive mode). I am hoping this is a feature that, when introduced, will patch the gaping hole in this workflow.
NOTE: Adobe Lightroom CC for the Desktop (not the Classic version) has the ability to copy the ‘Edit’ settings and then paste them to multiple images in either the Grid view or from multiple images selected from the ‘Filmstrip’ in ‘Edit’ view. This ability to quickly apply setting across many images is yet to make an appearance in Lightroom CC for phones and tablets.

Step by Step – I was really surprised to find out how many steps there were 🙁
Here are the steps to my own iPad Pro Imaging Workflow. This workflow has become a little more streamlined in the last couple of years (bypassing the need to first import to Apple Photos. I may have made the workflow more complex than it needs to be so please drop me a message if you have found a simpler one with less steps. I also advise that you look for any Adobe recommendations for running this type of workflow (one that uses both Lightroom CC and Lightroom CC Classic). I strongly suspect that Adobe expects most users to choose one or the other (Lightroom or Lightroom Classic) and not both, so their may be some teething issues if you deviate too far from what I am suggesting below. I also recommend that you set up Lightroom Classic before you start downloading images that were not originally synced using Lightroom Classic, e.g. the original images were uploaded via a mobile device (suggestions in next section).
- Subscribe to extra Cloud Storage with Apple and Adobe Creative Cloud. I have currently subscribed to 200 GB with Apple and 1 TB with Adobe. Note > Any files backed up to the Cloud on a trip will be most likely be temporary and removed when I have backed these files up on my RAID device after I have returned home.
- Go to Settings > Mobile Data on the iPad Pro and switch off the mobile data for Lightroom CC and Photos (syncing Raw files with anything other than fast Wi-Fi is not a good idea). I had uploaded 16 GB of Raw files before I had even found this option.
- Go to System Preferences > iCloud > Photos. Click on the Options button and uncheck the iCloud Photo Library option on any computer or mobile device that you don’t want your Raw images from your iPad to end up on.
- Download Lightroom CC to your iPad Pro and Sign in to your Creative Cloud account.
- In Lightroom CC go to Settings > ‘Cloud Storage & Sync’. Check the ‘Use Cellular Data’ is switched off (an extra precaution to prevent you from blowing your monthly mobile data allowance in one editing session).
- I also click on the Cloud icon in the top right-hand corner of the screen and choose ‘Pause Syncing’. I click on ‘Resume Syncing’ when an editing session is complete and I am left with just the hero images from my shoot.
- Insert SD card from camera into a Lightening SD Card Camera Reader or USB-C SD Card Reader (latest iPad Pro).
- Open Lightroom CC on your mobile device and select ‘Add Photos’.
- Select all the images you want to edit and then hit the Add Photos in the blue bar at the bottom of the screen.
- Review, Edit and Rate the photos in the Album. ‘Reject’ any images that you do not want to keep in the Lightroom Catalog if you are trying to avoid uploading too many images to the Adobe Creative Cloud (Creative Cloud subscribers who have only 20GB of storage). Remember that Lightroom will sync any file left in the Album when your resume syncing to your Creative Cloud account (if you have a Wi-Fi connection.
What follows are alternative steps for users syncing files via a WiFi Connection and users who would like to transfer files to their laptop or desktop computer without using WiFi connections.
Transferring without WiFi
- On your Mobile device, use the Filter icon to show only the Rejected Files. In the Options choose Delete (they will be removed from the Lightroom catalog but will remain on the iPad and can still be accessed via the Photos app). Note > You can choose to leave all images in the Lightroom Catalog if you do not plan to Sync with the Creative Cloud or have chosen to upgrade to the 1 TB Cloud Storage option and have access to fast WiFi connections.
- When you have returned home connect the iPad Pro to your computer and import the Raw files into Apple’s Photos Application on the computer.
- Then, in the Photos app on computer, go to ‘File > Export > Export Unmodified Originals’.
- Import images into Lightroom or Archive to an External Drive/RAID (remember that the edited images that remained in your Lightroom Catalog on your iPad will automatically be shared/downloaded to Lightroom Classic on your computer. Just remember that the default location for these Raw images controlled in Preferences > Lightroom Sync
Transferring with WiFi
- The least complex workflow to Sync your Lightroom Mobile Catalog is to use Lightroom CC and NOT Lightroom CC Classic – just enable the Sync options and that’s it.
- If you want to Sync to Lightroom CC Classic because your Catalog is larger than 1 TB, and you don’t want to pay for additional cloud storage, you are advised to follow the guidelines below.

My recommended ‘Sync Setup’ in Lightroom Classic
There are many forums where users have encountered ‘sync’ issues in either Lightroom CC or Lightroom CC Classic. If you are uploading images to your Adobe Creative Cloud storage, Lightroom is aware of the device and even the hard drive where these images originated from and this part of the metadata that looks after the syncing process. When Sync is switched on in Lightroom Classic, the full resolution images that were uploaded on all versions of Lightroom CC, except for the Classic version, will be downloaded to Lightroom Classic to a default location (usually a packaged file in the ‘Pictures/My Pictures’ folder). Lightroom Classic, by default will divide the storage of these full-resolution images into separate packaged files (one for each originating device). Having original device information and separated Sync storage locations, I feel, may complicate the issue for some users, and I believe may cause issues for syncing if these devices are either offline (or became offline during a syncing process) or these devices get updated or change their names. I may be playing a little too safe here, but when I decided to commit to this workflow I decided to start a NEW Classic Catalog and nominate a single folder where the synced files are stored.
NOTE > You can only have one Lightroom CC Classic Catalog that can Sync with the Creative Cloud. If you create a NEW Lightroom Classic Catalog and Sync this Catalog instead of the old one, you will lose any Smart Previews (and associated collections) in the Creative Cloud that were uploaded from the Synced collections of Lightroom Classic. This will not delete any Original files that were uploaded via Lightroom CC (all versions except the Classic version).
- If you take my advice because you want to avoid Syncing errors I suggest you follow the steps below.
- Create a new Catalog – holding down the Option/Alt key as you start Lightroom will give you the option to create a New Catalog
- Before you switch on the Sync option in the new Catalog, go to Lightroom > Preferences > Lightroom Sync and select the ‘Specify location for Lightroom CC ecosystem’s images’
- Nominate a folder and wait for the Syncing to complete – this Sync folder should be backed up with your other Folders of images as part of your normal backup routine.
- Add any images of folders of images from your hard drives that you want to be included into this new Catalog.

If you have to move your Catalog to a new computer, Lightroom Classic may encounter problems when the Synced files are missing. If you decide to nominate a folder on an external drive for your Sync location in the LR Classic Preferences panel, I would also recommend that you create ‘Smart Previews’ of all of the images downloaded after Lightroom Classic Syncs/downloads any original images from the Cloud. If you choose a specific location/folder after you have already been syncing files from your mobile devices you will find the images being downloaded to multiple locations (hence my advice to start a new Catalog if you commit this mobile workflow – think of it as a Before CC or After CC phase in your imaging workflows evolution). Lightroom, as of July 2018, does not consolidate any synced files before you nominated a Sync location. I feel this may be one reason that some Syncing issues may start at the Lightroom Classic end of the workflow. There are suggestions that can be found online if you run into syncing issues with your mobile device. The most common syncing error that users report is that the Lightroom on the mobile devices is unable to carry on syncing a number of images that seem to get ‘stuck’. Suggestions to resolve the syncing process stalling on a mobile device include signing out and back in to your CC account, changing the ratings of the images that are not Syncing, placing the images that are not Syncing into a new Album.
Resolving Sync Errors in Lightroom Classic
Most advice you will find online will assume the Sync errors in a Lightroom Cloud Workflow originate from uploading images from Classic to the Cloud (via Synced Collections). The workflow outlined in the post, however, will assume any Sync errors you are expereincing have originated from Original files you have successfully uploaded to the Cloud via a mobile device but are now appearing as Sync errors in Classic, i.e. ‘Download’ sync errors and not ‘Upload’ sync errors.
- Go to the Mobile device, click on the Cloud icon and check that Lightroom CC is ‘Synced and Backed Up’. You may have chosen to Sync over ‘WiFi Only’ on your mobile device (Use Cellular Data button is switched to Off in the mobile preferences).
- Try to resync an image again from Sync Errors collection in the Catalog panel of Lightroom Classic (above the Folders panel in the Library module). Click on the sync symbol in the thumbnail of the image.
- Go to Preferences > Lightroom Sync and check the sync activity in this panel. Click on an error message to give you more information about the specific error.
- Try deleting the sync.lrdata file*. Close Lightroom classic, delete this sync.lrdata file, reopen Lightroom classic and Sync again.
Mac: /Users//Library/Caches/Adobe/Lightroom/Sync Data/Sync.lrdata
Windows: C:\Users\\AppData\Local\Adobe\Lightroom\Caches\Sync Data\Sync.lrdata
*Note > The ‘Delete Synced Data‘ button in the Lightroom Sync Preferences Panel of Lightroom Classic will invite you to delete all the images in your Cloud Catalog. It is not the same as deleting the sync.lrdata file (which will not delete the original images in the Cloud).
Conclusion
The good news is that the workflow works (for me). I was, however, slightly surprised that I hadn’t thought through how the workflow would work before I started this test run. I found myself scratching my head a few times as things were not as obvious as I expected them to be. Crashing my office iMac was certainly one aspect I hadn’t considered because it was not directly used in the workflow. One aspect of the workflow that I don’t see being resolved for photographers using an iPad is the fact that images can’t be imported directly into Lightroom – they have to pass through the Photos App. I feel this involves a certain amount of double-handling that users on a laptop do not have to deal with.
I am not sure whether this review will encourage you to dive in and use the workflow yourself or just put you off the idea. For users who are very comfortable with Cloud workflows I am sure this is all manageable and nothing to be feared. The idea of not having to carry another two pounds of glass, metal and plastic may be all the encouragement you need 🙂


If you find this tutorial of value please consider making a donation: http://paypal.me/alphacreativeskills