Blog, Capture, Learn, Movies, Tips and Techniques
Capture: Shooting Movies on Sony Alpha Cameras using ‘Picture Profiles’
When Sony introduced Picture Profiles to its Sony Alpha and RX cameras it provided professional movie making tools to its entry level, prosumer and professional stills cameras. S-Log2 is one of the most ‘useful’ profiles but it needs a little skill to use it appropriately. Mark Galer gives you a quick overview of how to use the Picture Profiles to leverage the best IQ from your movie clips.
Why Shoot with Picture Profiles
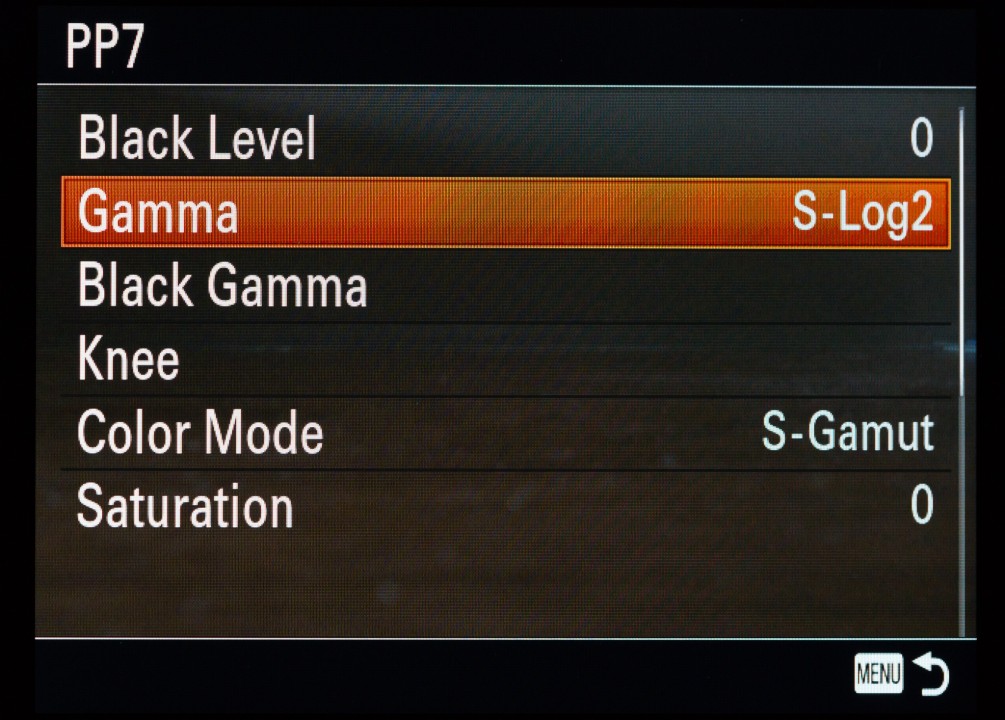
There are a range of Picture Profiles that are available when shooting Movies. These can be accessed via the ‘Menu’ on most recent Sony Alpha or RX cameras. The idea of selecting a Picture Profile is to modify the appearance of the resulting movie file ‘in-camera’. The Picture Profiles with the lower numbers (PP1 to PP4) will provide subtle variations of contrast and colour and can be customised so that you can create ‘the look’ or visual appearance of the movie footage ‘in-camera’. The Picture Profiles that have the larger numbers (PP5, PP6, PP7 etc.) are designed to lower contrast and extend the dynamic range. The Picture Profiles with the higher numbers are intended for use when the subject brightness range is high and the risk of clipping either the shadows or highlights is also high (this is common when shooting in sunlit conditions). When shooting stills, using the Raw format, it is a simple matter to recover highlights and shadows in post-production. Movie shooters, however, must lower the contrast of the movie file at the time of capture by selecting an appropriate Picture Profile. When using the Picture profiles with the higher numbers it will then be necessary to restore mid-range contrast and set blacks and whites using post-production editing software such as Adobe Premiere Pro.

Recommendations for shooting with Picture Profiles
For users who are inexperienced with editing or grading low contrast movie footage I would recommend using PP5 or PP6 (the profiles that use the Cine1 Gamma and Cine2 Gamma) to lower contrast of the movie file in high contrast shooting situations. PP7 and PP8 are profiles that Sony has assigned the S-Log2 and S-Log3 Gamma curves (these can effectively double the dynamic range of your camera when shooting movies. The S-Log profiles are professional profiles that can be ‘tricky’ to shoot with and edit or ‘grade’ in post production for the inexperienced user. Sony has assigned PP7 with the S-Log2 profile, by default, and this profile produces very flat movie footage. S-Log2 has a minimum ISO setting of either ISO 1600 or ISO 3200 and therefore has to be used in conjunction with ND filters if you intend to shoot with wider apertures and keep the shutter speed at a setting that is appropriate for recording movies (below 1/125 second). The Picture Profiles that use S-Log2 and S-Log3 (S-Log 3 is only available on some Alpha models such as the A7SII) do not respond well to underexposure, and it is advisable to raise the exposure compensation by +1.00 stop or more and then monitor the highlights using the ‘Zebras’ function. These actions will ensure the shadows do not appear excessively noisy. Some Alpha cameras, such as the A7SII, have a feature called ‘Gamma Display Assist’ that display a ‘normal’ contrast scene on the monitor of EVF when shooting with a very low-contrast Picture Profile such as PP7. This can be useful aid to help focus and also for clients to view a more ‘normal’ preview while filming is underway.

Grading S-Log Movie Clips
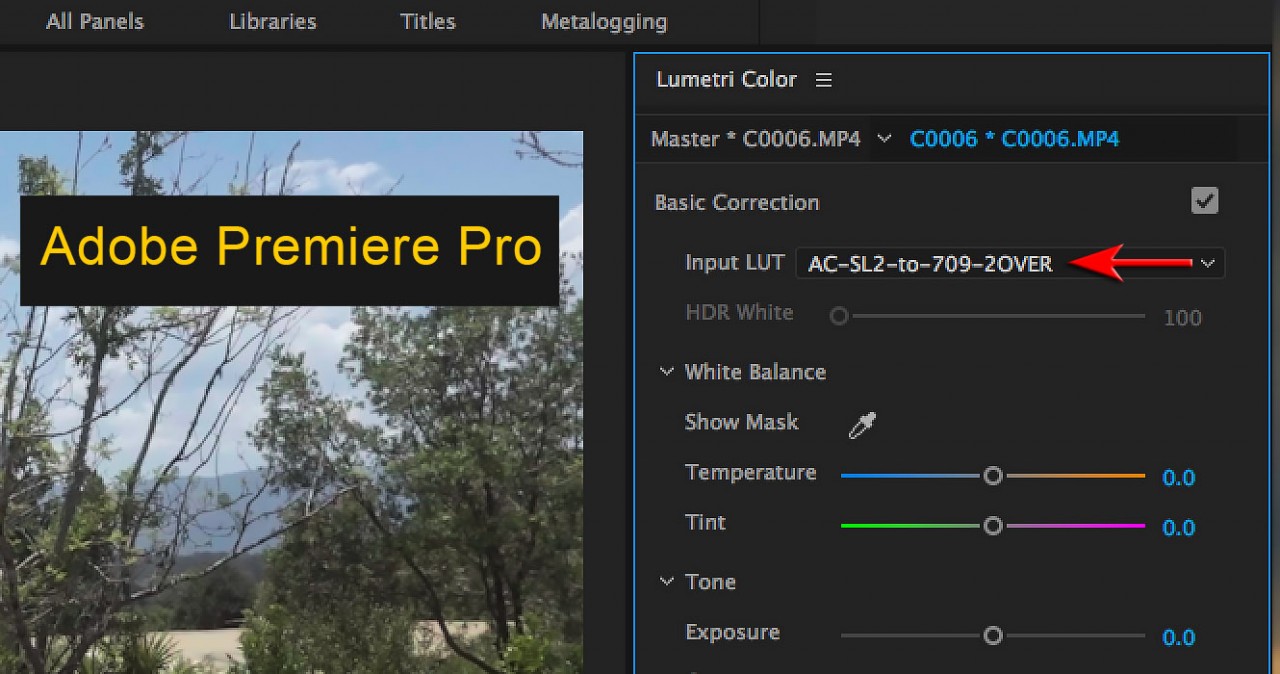
It can be very tricky restoring the mid-range colour and contrast of a movie clip that has been captured with either the S-Log2 or S-Log3 Gamma Curve. Many professional movie editors will first assign a ‘LUT’ (Look-Up Table) to the clip to make the grading process much faster. The use of LUTs can be likened to still photographers assigning ICC Picture Profiles to their Raw images to quickly change the visual appearance of the base file. LUTs are a one-click edit solution that will restore contrast and saturation. Only fine-tuning remains before the file is ready to publish. LUTs are available for download online (see links below).

S-Log-2 Overview
- Use when the subject brightness range is high, e.g. sunlit scenes with dark shadows.
- Overexpose by 1.00 to 2.00 stops.
- Use ‘Zebras’ to monitor the highlight values (typically 70-90% – white tones such as a white shirts, white paper or white clouds should just start to show the zebras).
- Use an ND filter to keep the shutter speed low (an ND64 maybe required in bright sunlight if you want to use the wider apertures).
- Apply a LUT in post production to ‘grade’ the movie footage quickly.
More Information and Downloadable LUTs
Alister Chapman has written excellent and in-depth articles for shooting movies with S-Log Gamma Picture Profiles using Sony Alpha cameras.
The A7S article can be read here: EXPOSING AND USING S-LOG2 ON THE SONY A7S
The A6300 article can be read here: USING S-LOG2 AND S-LOG3 WITH THE SONY A6300
Alister has made his LUTSs available to download so be sure to donate some money for this excellent service 🙂

Pingback: Become an Enlightened Alpha photographer | Mark Galer
Pingback: From Stills to Movies - Mark Galer