

One Shot Wonders – Lightroom Develop Presets
26 of my favourite Develop presets to fast-track image editing workflows in the Develop module of Lightroom.
These Presets are available for Patrons to download from Patreon.com/markgaler
26 of my favourite Develop presets to fast-track image editing workflows in the Develop module of Lightroom.
These Presets Include:
- 1 x Contrast and Clarity Preset to make your images ‘pop’
- 1 x Dynamic range Preset to restore detail in subjects photographed in high contrast lighting
- 2 x Black & White presets
- 2 x Graduated Filter Presets
- 2 X HSL Presets to either darken the sky or lighten skin
- 2 x Keystone presets to reduce the effects of converging verticals
- 3 x Noise reduction presets for images captured at high ISO
- 1 x Lens Profile Corrections
- 3 x Camera Profile Alternatives
- 2 x Radial Filter Presets
- 3 x Sharpening Presets
- 2 x Split Toning Presets
- 2 x Post Crop Vignette Presets
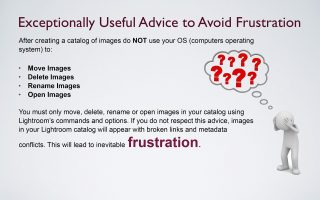
I have also included Presets to Reset various aspects of the development process.
IMPORTANT NOTE > Adobe Develop Presets changed file format from ‘.lrtemplate‘ to ‘.xmp‘ in mid 2018. If you import the older .lrtemplate presets (as directed by the movie below) they will now be converted to .xmp files and moved to the Settings folder in the Camera Raw folder. .xmp Develop Presets can now be used in Adobe Camera Raw and Lightroom CC as well as Lightroom Classic.
Testing a Preset
Select one of your images (it is better to start on an image that was correctly exposed so that you can clearly see the effect of the preset).
NOTE > After clicking on the Preset you will probably need to fine-tune the effect by adjusting some of the sliders in the Basic panel.
Related products
post-production
My Lightroom 'Prime' Presets are used in my 'General' workflows to fast-track my imaged editing.

This 55-page illustrated eBook shows you how to organise and manage your photos using Lightroom Classic.

This extended tutorial takes you through the entire editing workflow in Lightroom's Develop module
Lightroom Presets
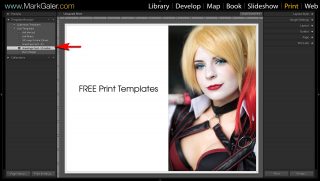
Four Print Templates (A4 and US Letter) for Adobe Lightroom.

post-production
A set of Lightroom Export Presets that enable you to export images at appropriate sizes for Social Media Platforms such as Facebook, Twitter and Instagram.

Everything you need to know in order to create dynamic timelapse movies

These objective edits include setting a custom white balance (if one has not already been set in camera), setting the whites and blacks, applying the lens profile and setting our preferred sharpening settings.
50-page eBook that provides a 'step-by-step' workflow of how to make a book using Lightroom's Book Module
Movie Tutorials
A one-hour tutorial to get you up and running in Adobe Lightroom.

Photoshop Elements
Tutorial for Photoshop Elements Users: Editing in 16 Bits (Learning Package)
This tutorial pack includes a 20 minute HD movie tutorial, step-by-step PDF and the camera Raw file used in the tutorial
Lightroom CC (mobile) Editing Guide - Free Download - 277 Pages
This 250-page eBook is a post processing masterclass that looks at the powerful tools we can use to develop our images.